


Hello Poppy Seed Project Readers!
I'm Ariean from OneKriegerChick where I blog about life in between laundry and kissing boo-boos...As well as home decor, kids crafts and family pleasing recipes {all on a budget!} Love it if you paid me a visit! Super excited to be back to share another fun Poppy Seed project with all of you!
It's back to school time at our house and with back to school comes a multitude of other after-school and evening activities. Not sure about you, but I have a hard time keeping track of it all. Therefore, I have been trying to come up with ideas to make life easier (and more organized!)
Today, I would like to share a fun way to post your Dry Erase Weekly Menu/Planner...
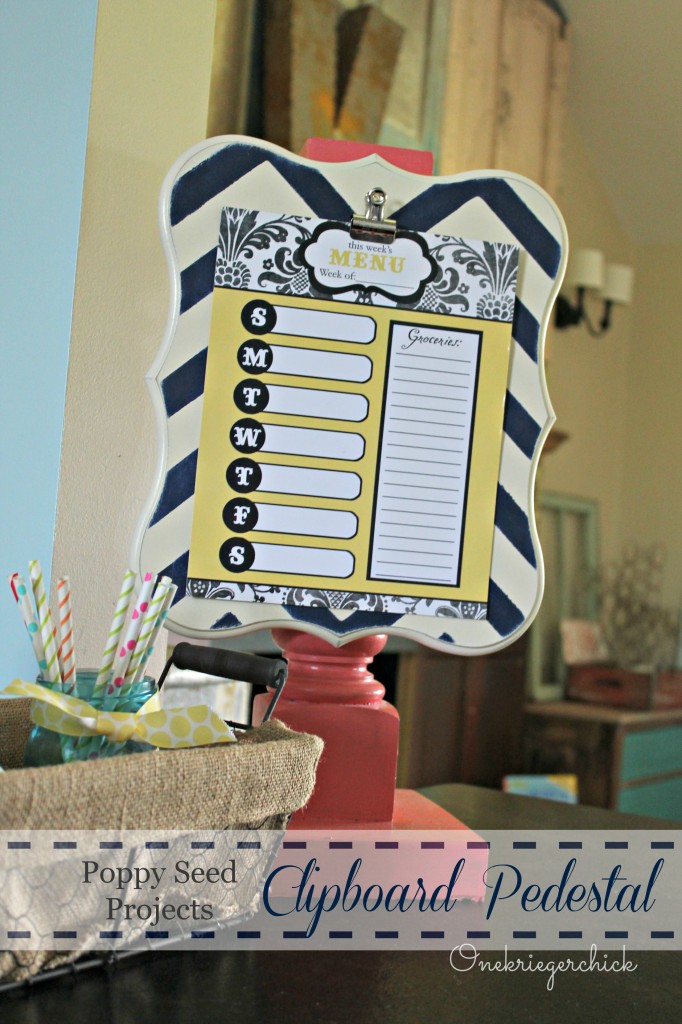
I was fortunate enough to meet Holly in a class at SNAP and received one of these darling Dry Erase Weekly Menu/Planner as part of my SWAG. It has been magnetized to the side of my fridge for months, but it is way too cute to be on the side of a fridge! Why not post a Weekly Menu on a fun clipboard pedestal!
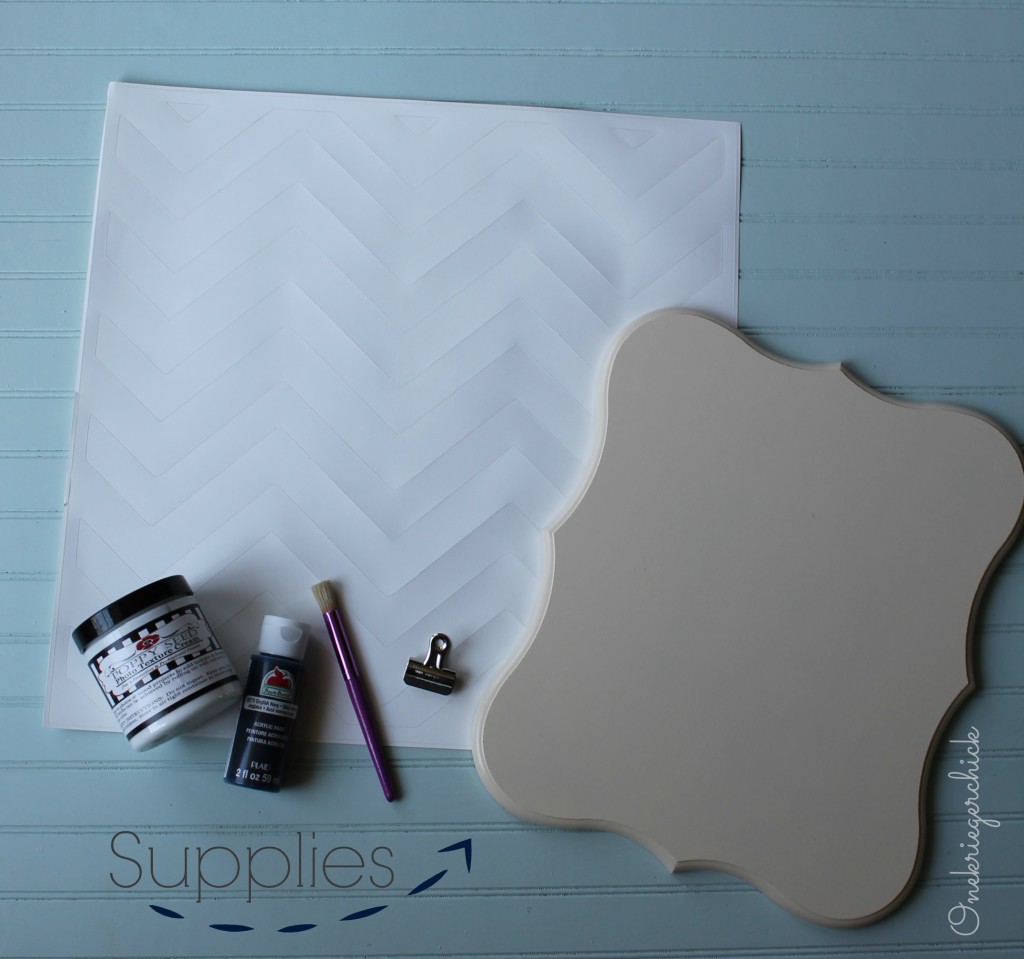
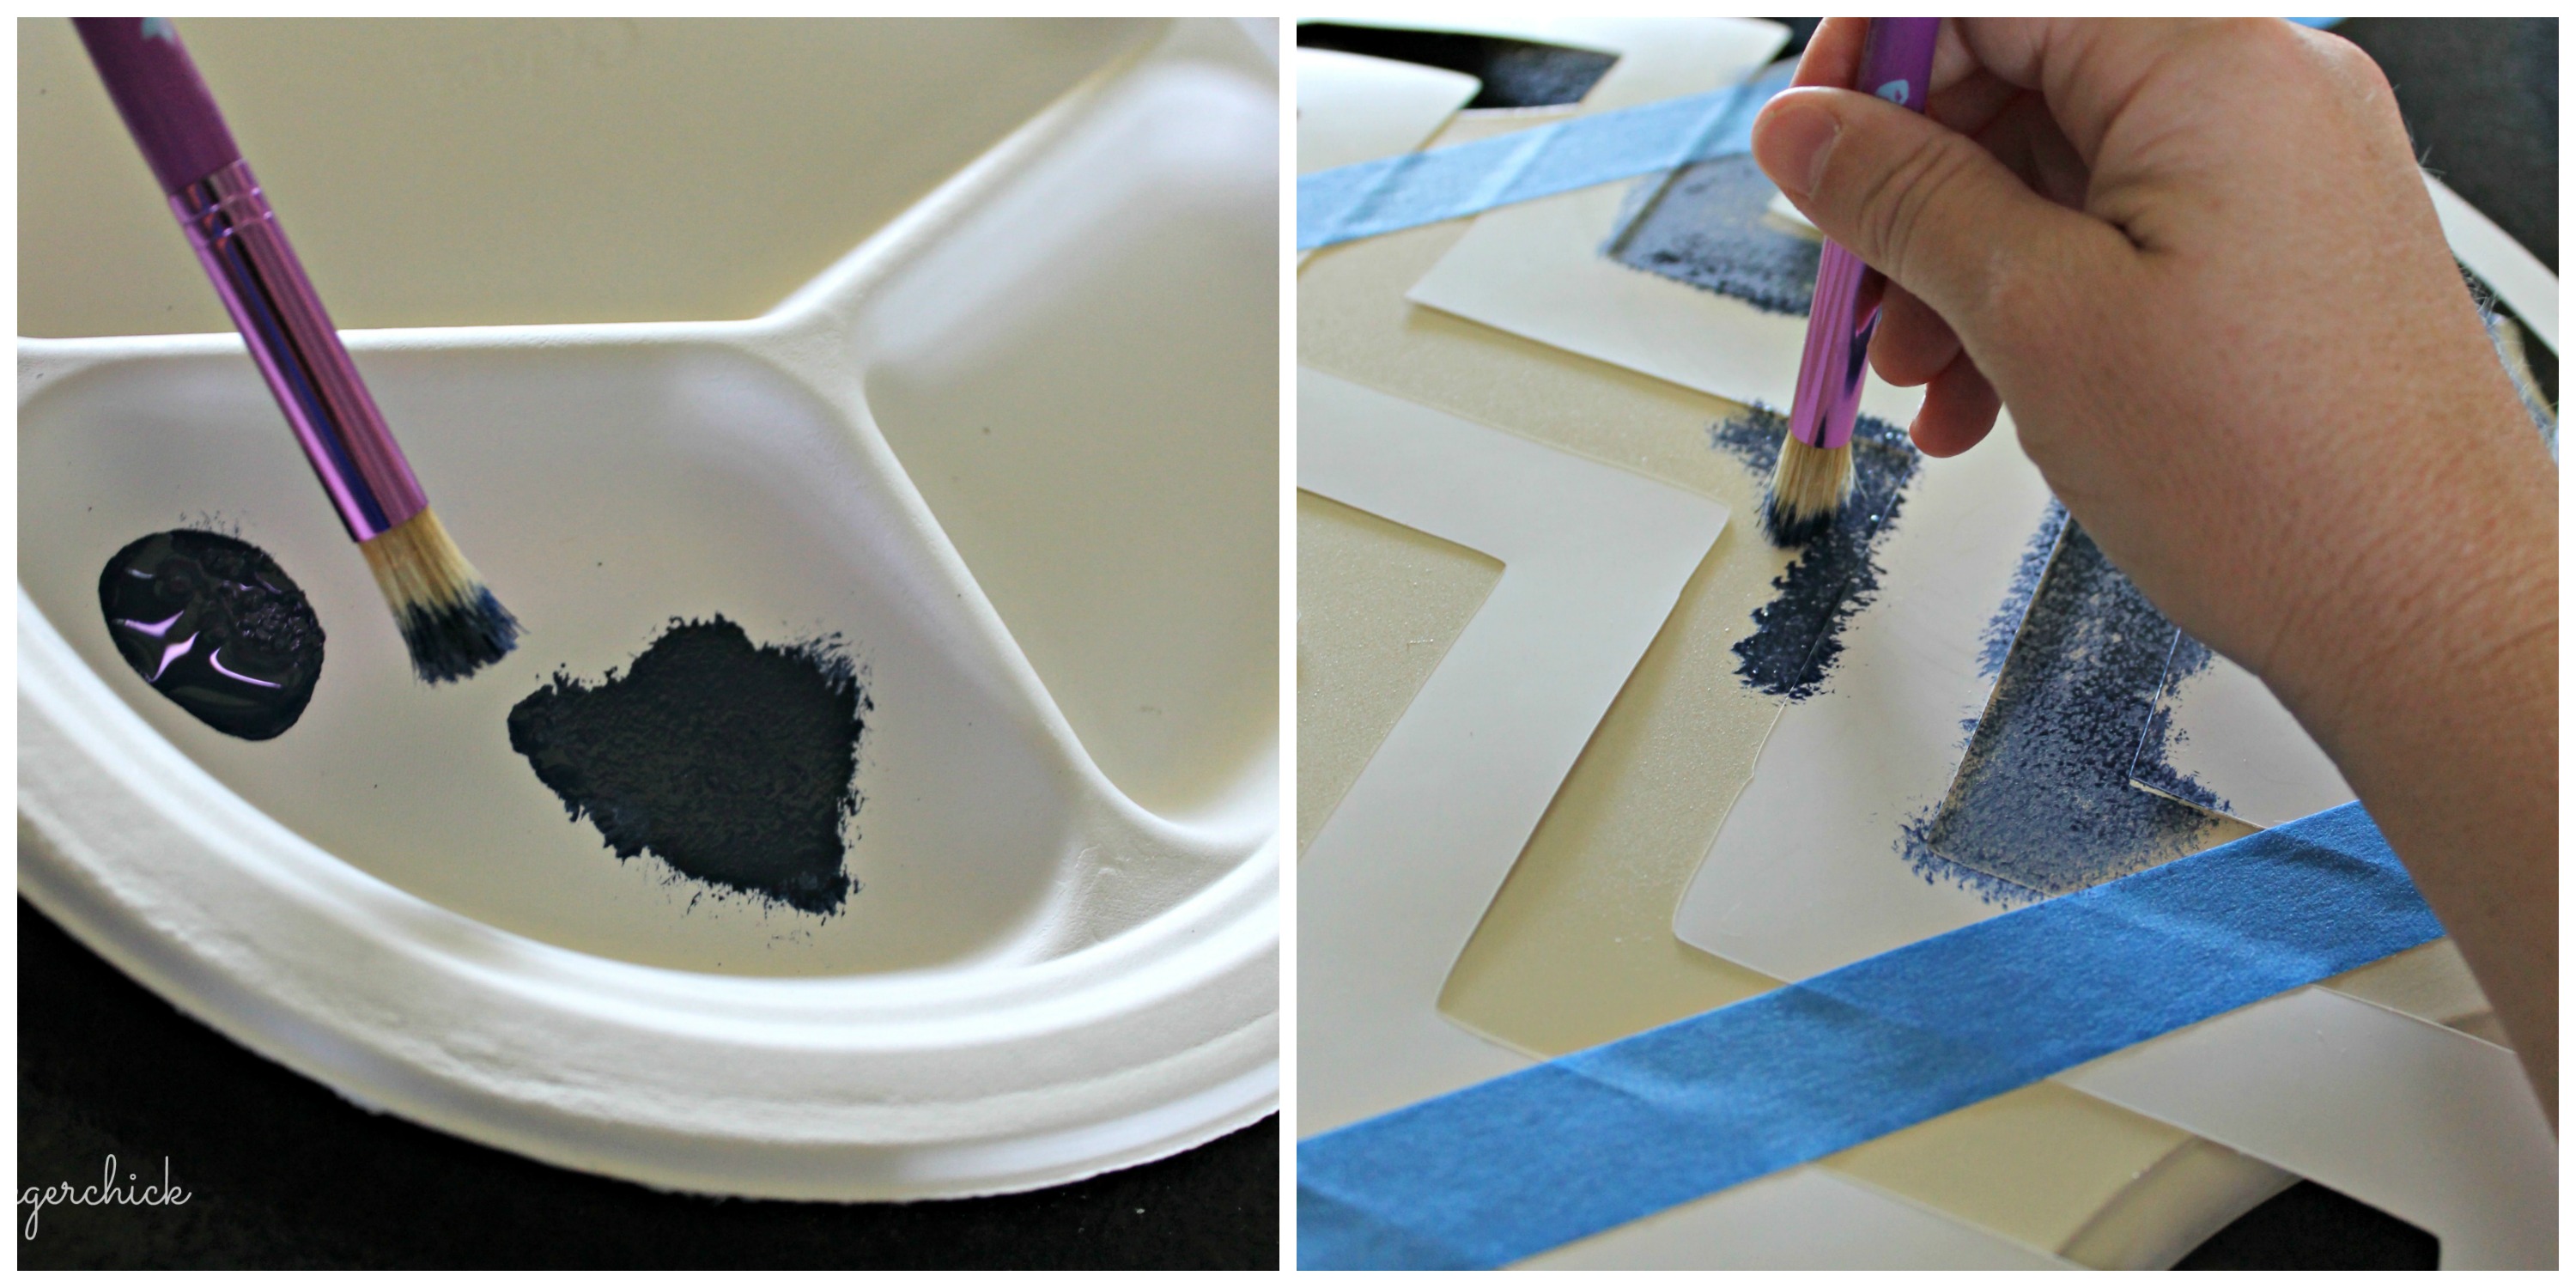
Supplies needed: Poppy Seed Projects Dry Erase Weekly Menu/Planner Poppy Seed Projects Eleanor plaque Poppy Seed Projects Texturizing cream Poppy Seed Projects Chevron reusable stencil Cream spray paint navy acrylic paint stippling brush painters tape bullnose clip glue gun pedestal or newel post (if desired) Whew...That seems like a lot, but it won't when we get started! Start by applying the texturizing cream to the plaque. Find Holly's easy to follow video tutorial {Here}. Then, spray the plaque with cream spray paint (or color of your choice). It took a couple coats to get the coverage I desired. I advise painting both sides. When it is dry, lay the stencil on top and center with the points on the top and bottom of the plaque. Tape the stencil onto the plaque to keep it from moving.
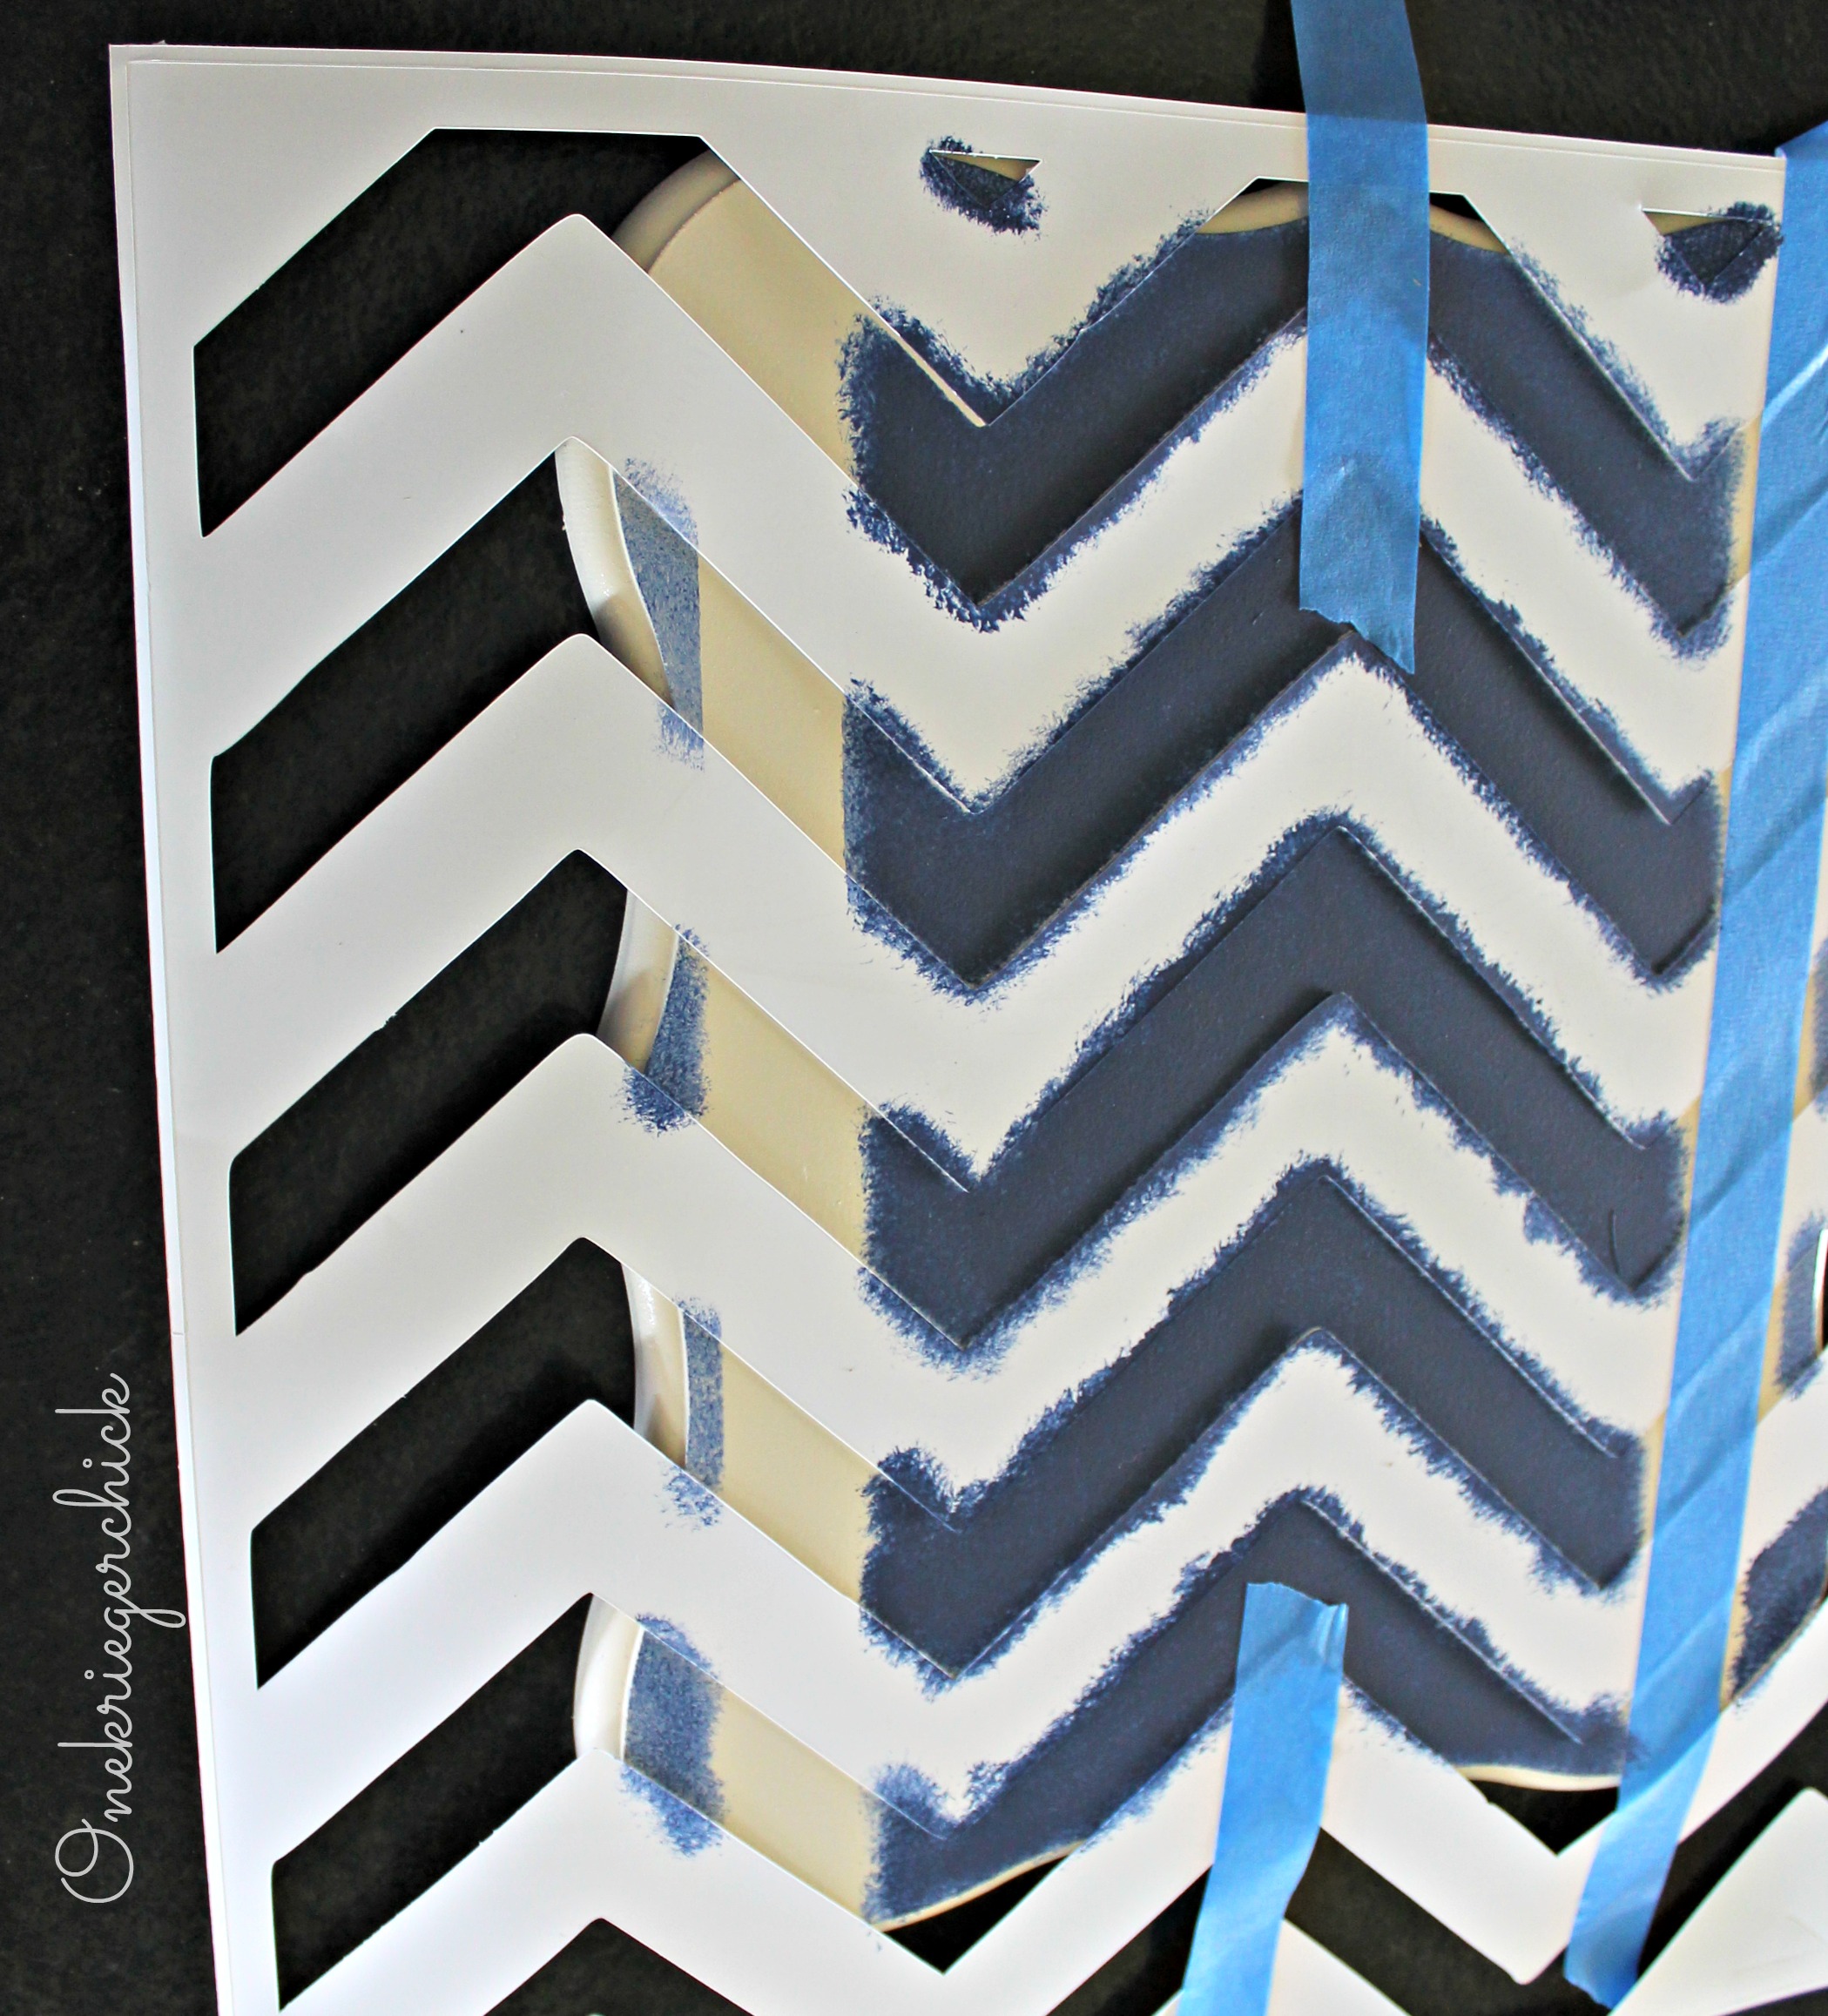
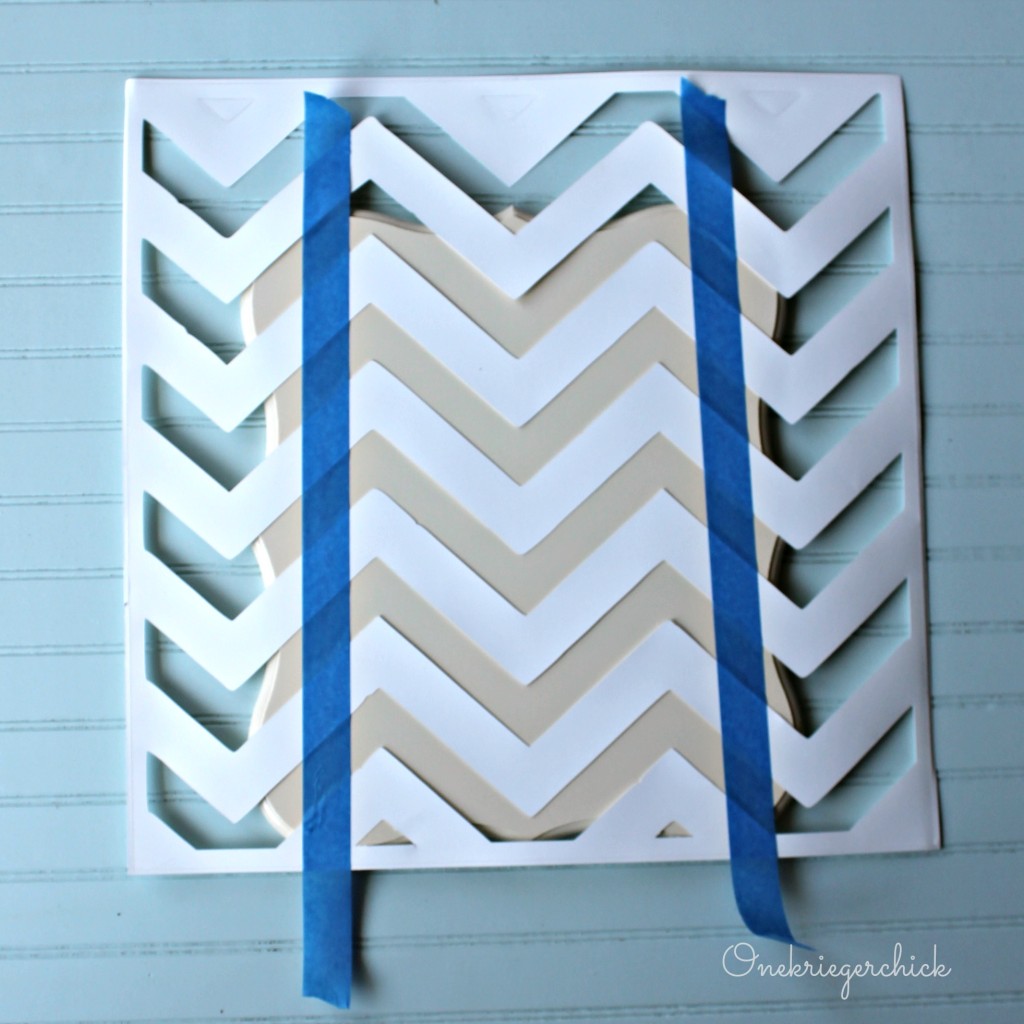 Now it's time to paint...I chose to do a technique called stippling because I did not want the lines to look perfect. Get a little paint on your brush, then dab it off. Gently pat your brush at an upright angle...Brush should only touch project with the flat part of the brush, not the side. Otherwise, the bristles will sneak under the stencil. You will want to hold onto the stencil while applying the paint to keep it from shifting. Once you have applied paint to the available area, relocate the tape to another spot. Then finish painting the empty spaces. It took three coats to achieve the look I was going for.


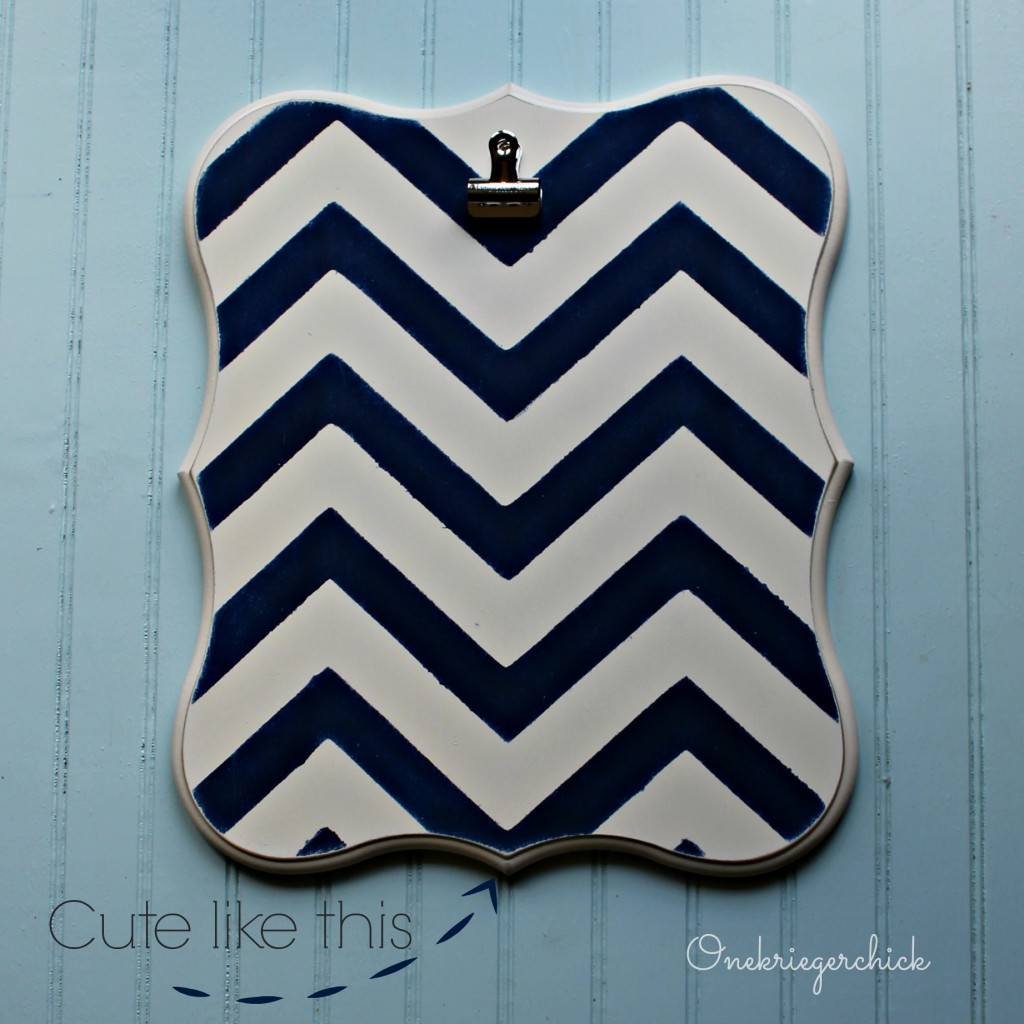
Allow the paint to dry and (if desired) sand the edges and give the stenciled area a light sanding. This will just give it a more distressed look, which I love! Lay the Dry Erase Weekly Menu/Planner down on the plaque and mark where you would like the bull-nose clip to be. Attach the clip with hot glue or you may want to nail it on.
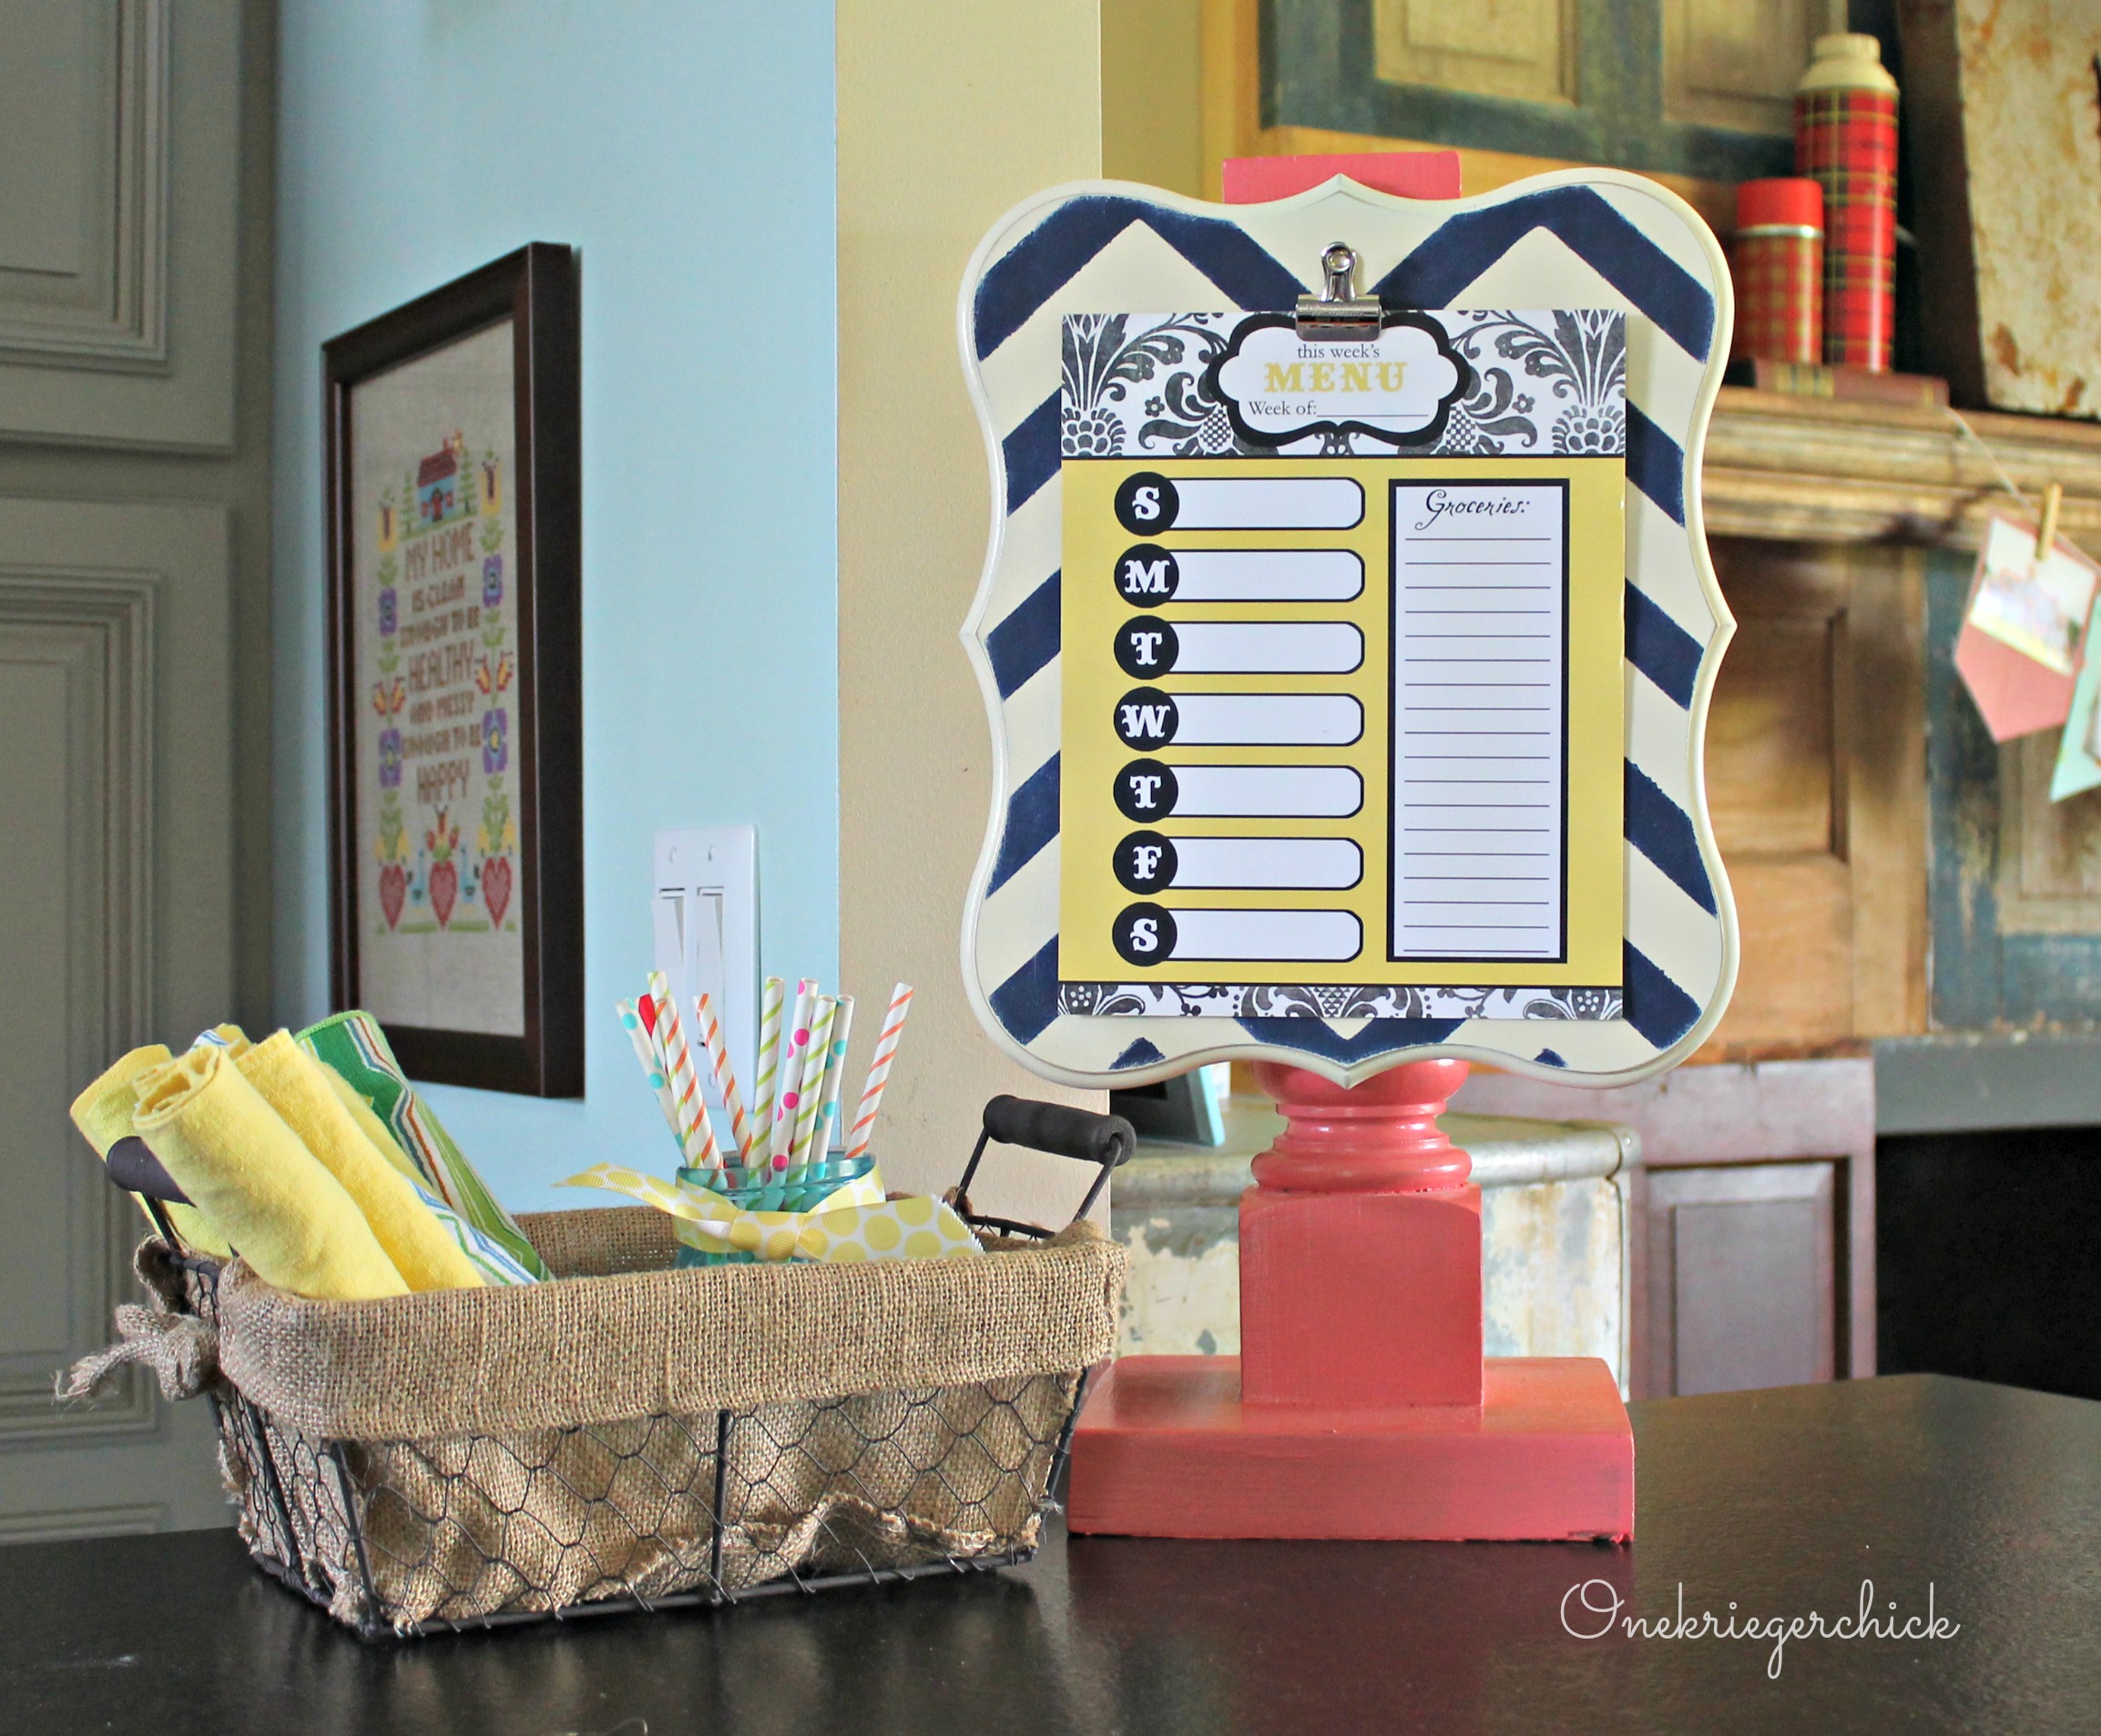
Then attach your plaque to a post or add hardware to hang on a wall.
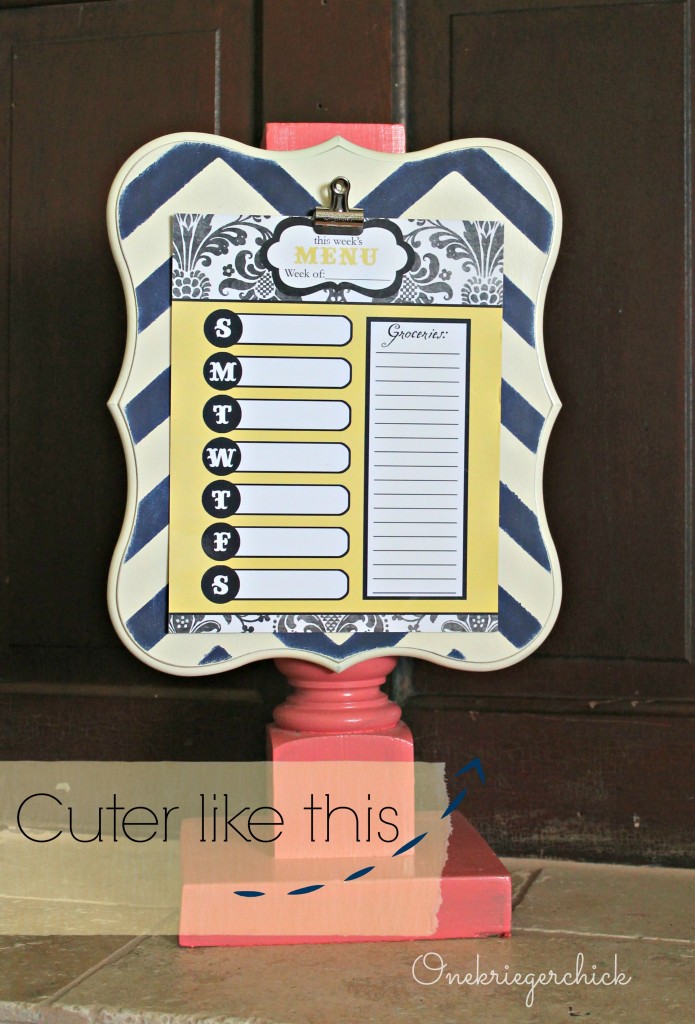
Now, you have a fun, pretty and practical way to view your Dry Erase Weekly Menu/Planner! I keep ours on our kitchen island...It's so nice to know what's for dinner at a glance.


I was fortunate enough to meet Holly in a class at SNAP and received one of these darling Dry Erase Weekly Menu/Planner as part of my SWAG. It has been magnetized to the side of my fridge for months, but it is way too cute to be on the side of a fridge! Why not post a Weekly Menu on a fun clipboard pedestal!
Here's How I did it...
Supplies needed: Poppy Seed Projects Dry Erase Weekly Menu/Planner Poppy Seed Projects Eleanor plaque Poppy Seed Projects Texturizing cream Poppy Seed Projects Chevron reusable stencil Cream spray paint navy acrylic paint stippling brush painters tape bullnose clip glue gun pedestal or newel post (if desired) Whew...That seems like a lot, but it won't when we get started! Start by applying the texturizing cream to the plaque. Find Holly's easy to follow video tutorial {Here}. Then, spray the plaque with cream spray paint (or color of your choice). It took a couple coats to get the coverage I desired. I advise painting both sides. When it is dry, lay the stencil on top and center with the points on the top and bottom of the plaque. Tape the stencil onto the plaque to keep it from moving.
Allow the paint to dry and (if desired) sand the edges and give the stenciled area a light sanding. This will just give it a more distressed look, which I love! Lay the Dry Erase Weekly Menu/Planner down on the plaque and mark where you would like the bull-nose clip to be. Attach the clip with hot glue or you may want to nail it on.
Then attach your plaque to a post or add hardware to hang on a wall.

Now, you have a fun, pretty and practical way to view your Dry Erase Weekly Menu/Planner! I keep ours on our kitchen island...It's so nice to know what's for dinner at a glance.
Hope you will come visit me over at OneKriegerChick! Thanks again Poppy Seed for having me!
No comments:
Post a Comment